Configuring SSO with Okta
Requirements
- A user with an Admin role in Okta Portal. If you do not have this role, please reach out to an Okta Portal Admin within your organization to configure the integration.
Installation
- Log into the Okta Developer Console.
- Expand Applications from the sidebar and select Applications.
- Click Create App Integration.
- Select SAML 2.0 and click Next.
- Enter the general information for the integration, then click Next.
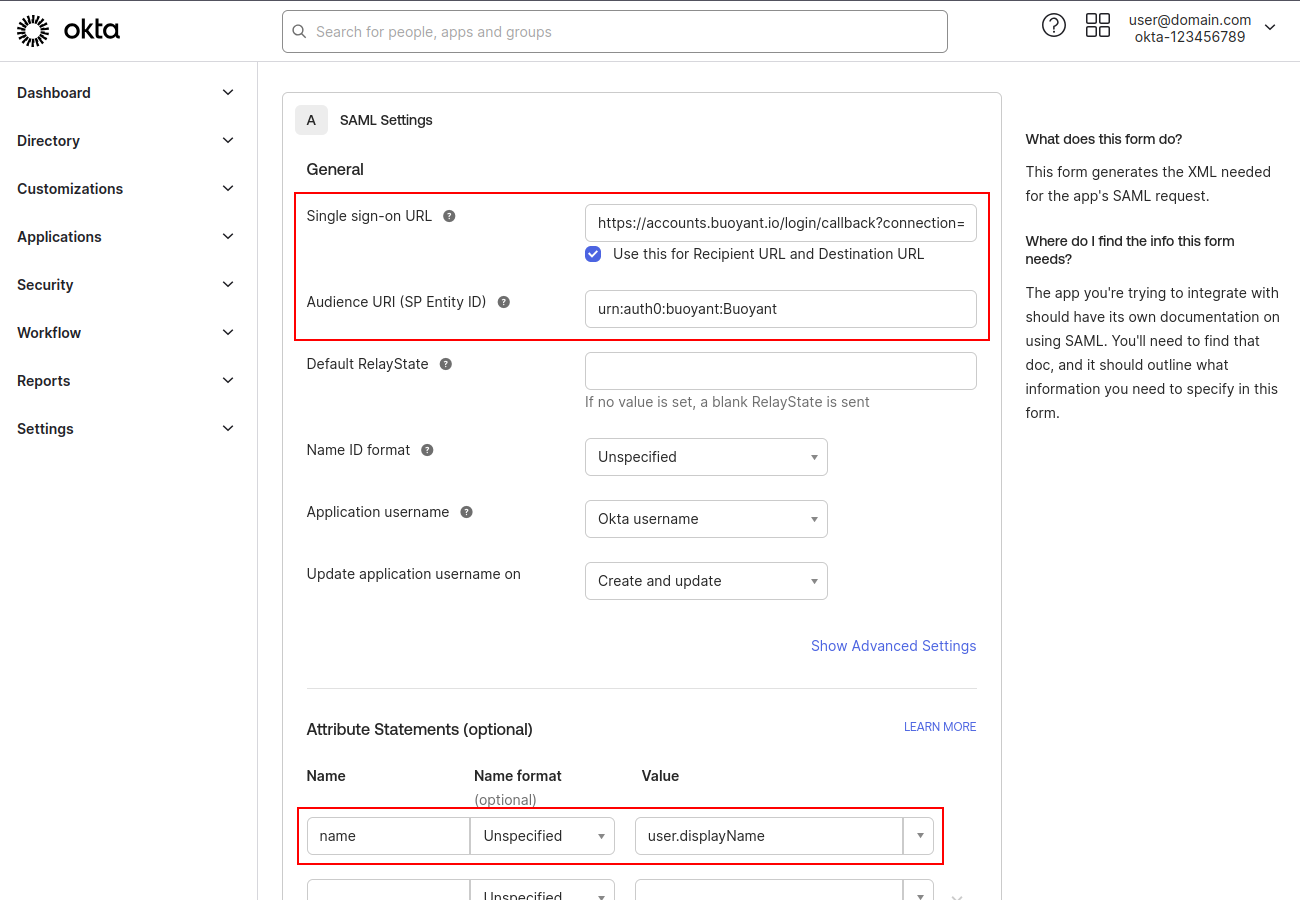
- Use the following values for the configuration:
Single Sign-On URL:
https://accounts.buoyant.io/login/callback?connection=<org>Audience URI (SP Entity ID):
urn:auth0:buoyant:<org>Additionally, add an attribute statement with the name
nameand the valueuser.displayName.
Click Next, then Finish.
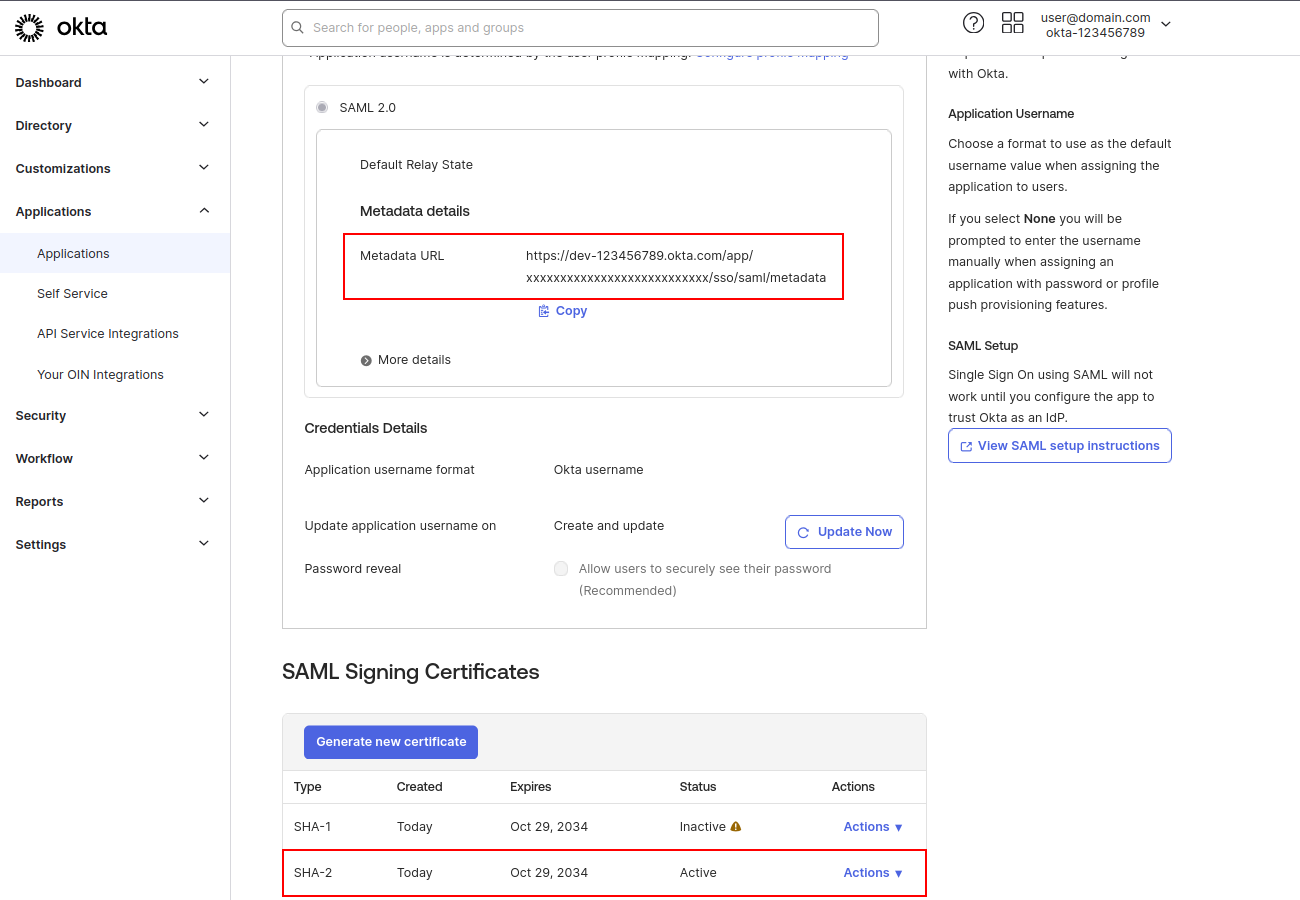
Once completed, you will be able to access both the Identity Provider Single Sign-On URL and the X.509 certificate.

Share these values with the Buoyant Team, who will then proceed with the configuration of the Portal.
Create a Bookmark URL Tile in Your Okta Dashboard
We recommend creating a Bookmark URL tile in your Okta dashboard for your users to make the login process easier:
- Navigate to Applications > Applications.
- Click Browse App Catalog.
- Click Bookmark App > Add Integration.
- Application Name: Buoyant Cloud
- URL: The login URL our team provides upon integration confirmation (e.g.,
https://buoyant.cloud/login?connection=<org>).
Uninstall
To uninstall the application from the Okta portal, follow these steps:
- Log into the Okta Developer Console.
- Navigate to Applications > Applications.
- Find the Buoyant Cloud application in the list and click on it.
- Click on the Delete button at the top of the application details page.
- Confirm the deletion when prompted.
This will remove the Buoyant Cloud application and any associated configurations from your Okta environment.
